

Soldiering on, let's continue with now developing our CRUD capabilities to store our data.
Btw, if you are not sure, you can view your AWS Amplify environment by going into the AWS console and check into the admin console.
In the Deployment Activity, we can view the list of activities that we have performed in our backend environment. As you can see, we have amplify push and pushed our local configs for our backend that we developed in our first post.
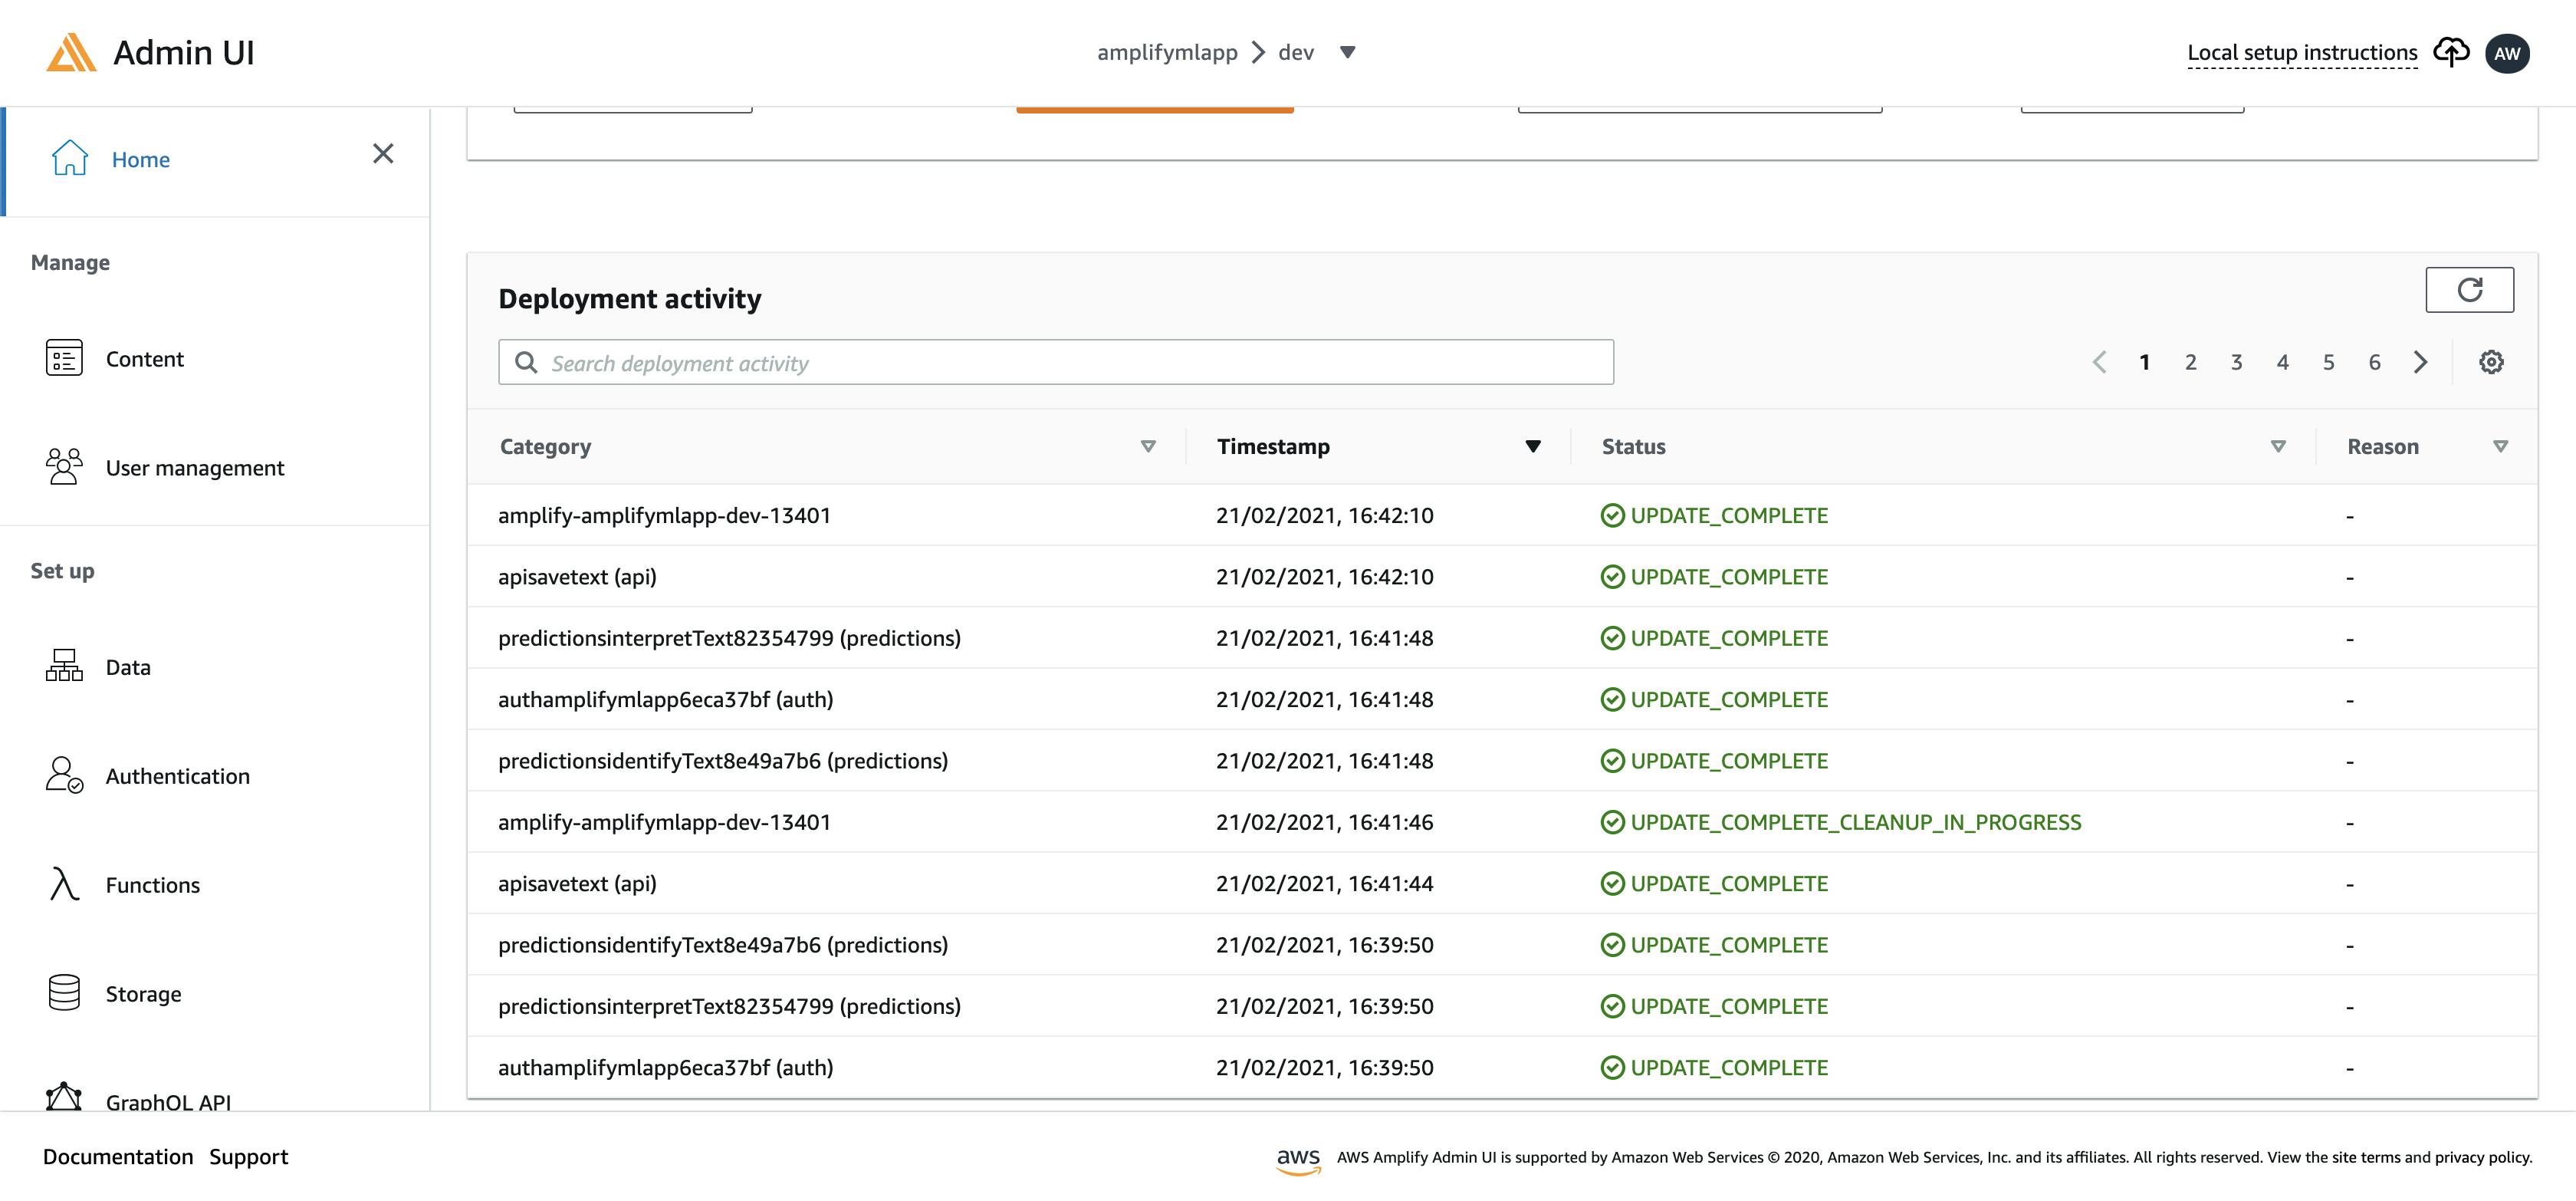
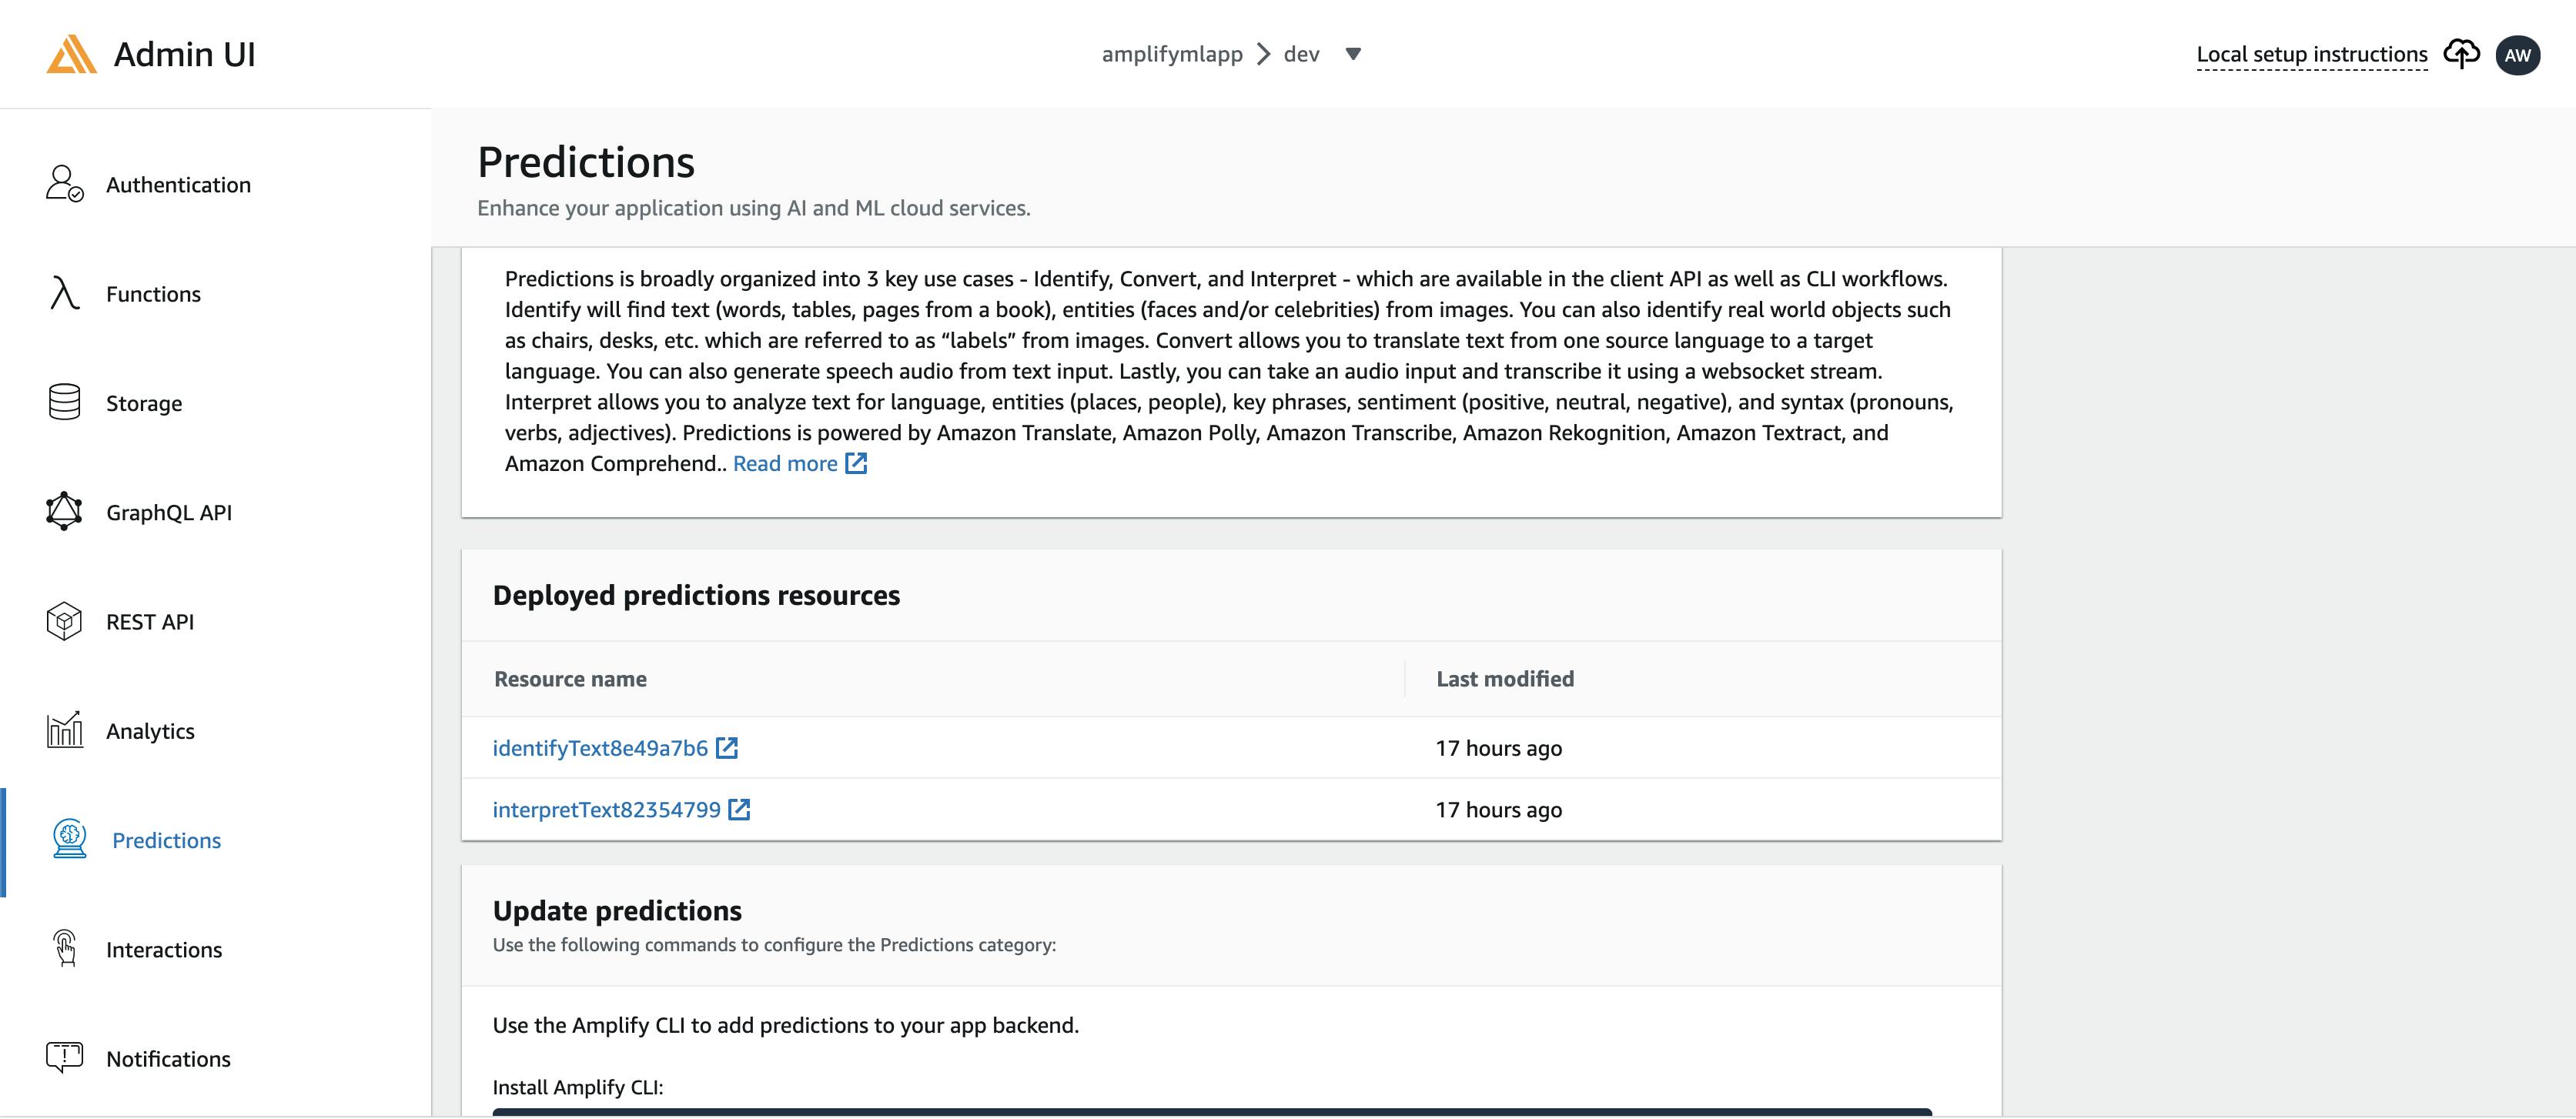
Let's take a look at our Prediction API deployments There are
- identifyText (identifyText8e49a7b6 )
- interpretText (interpretText82354799 )
We can click in to drill down and look into these deployments
I will leave it to you to explore the console as this isnt the focus of the post but if you have any questions, feel free to hit PM me :)
- Now, lets focus on developing our GraphSQL. To start off lets do a
amplify add api
adrianlee@ladrian-a02 my-app % **amplify add api**
? Please select from one of the above mentioned services: **GraphQ**L
? Provide API name: **amplify-ml-textresponse**
? Choose the default authorization type for the API: **API key**
? Enter a description for the API key: **public**
? After how many days from now the API key should expire (1-365): **365**
? Do you want to configure advanced settings for the GraphQL API: **No**
? Do you have an annotated GraphQL schema? **N**
? Choose a schema template: **Single object with fields**
? Do you want to edit the schema now? (Y/n) **Y**
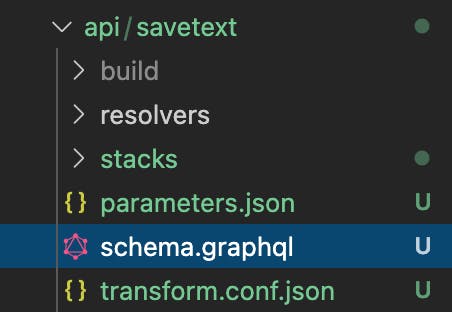
- After which, the CLI should open this GraphQL schema in your text editor.
amplify/backend/api/my-app/schema.graphql
If you are unsure where this file is, I have attached a screenshot of the folder composite
- Now, let's update the schema (
schema.graphql) to the following:
type post @model {
  id: ID!
  description: String
  uploaded: String
  sentiment: String
}
After saving the schema to the proposed above, we can go back to the CLI and press enter.
Cool! we will now deploy our API. Like before, let's do a
amplify pushand deploy our newly created API. If you scroll over to the Amplify Admin console, we can see the newly created API schema in AppSync

- We can take a look at the graphQL editor by opening the AppSync dashboard.
adrianlee@ladrian-a02 my-app % amplify console api
? Please select from one of the below mentioned services: **GraphQL**
- Now let's try and add some data to our newly created GraphQL. To do so, lets open up the GraphQL editor. In the editor, create a new post
mutation createPost {
  createPost(input: {
    description: "Best burgers in NYC - Jackson Hole"
  }) {
    id
    description
  }
}
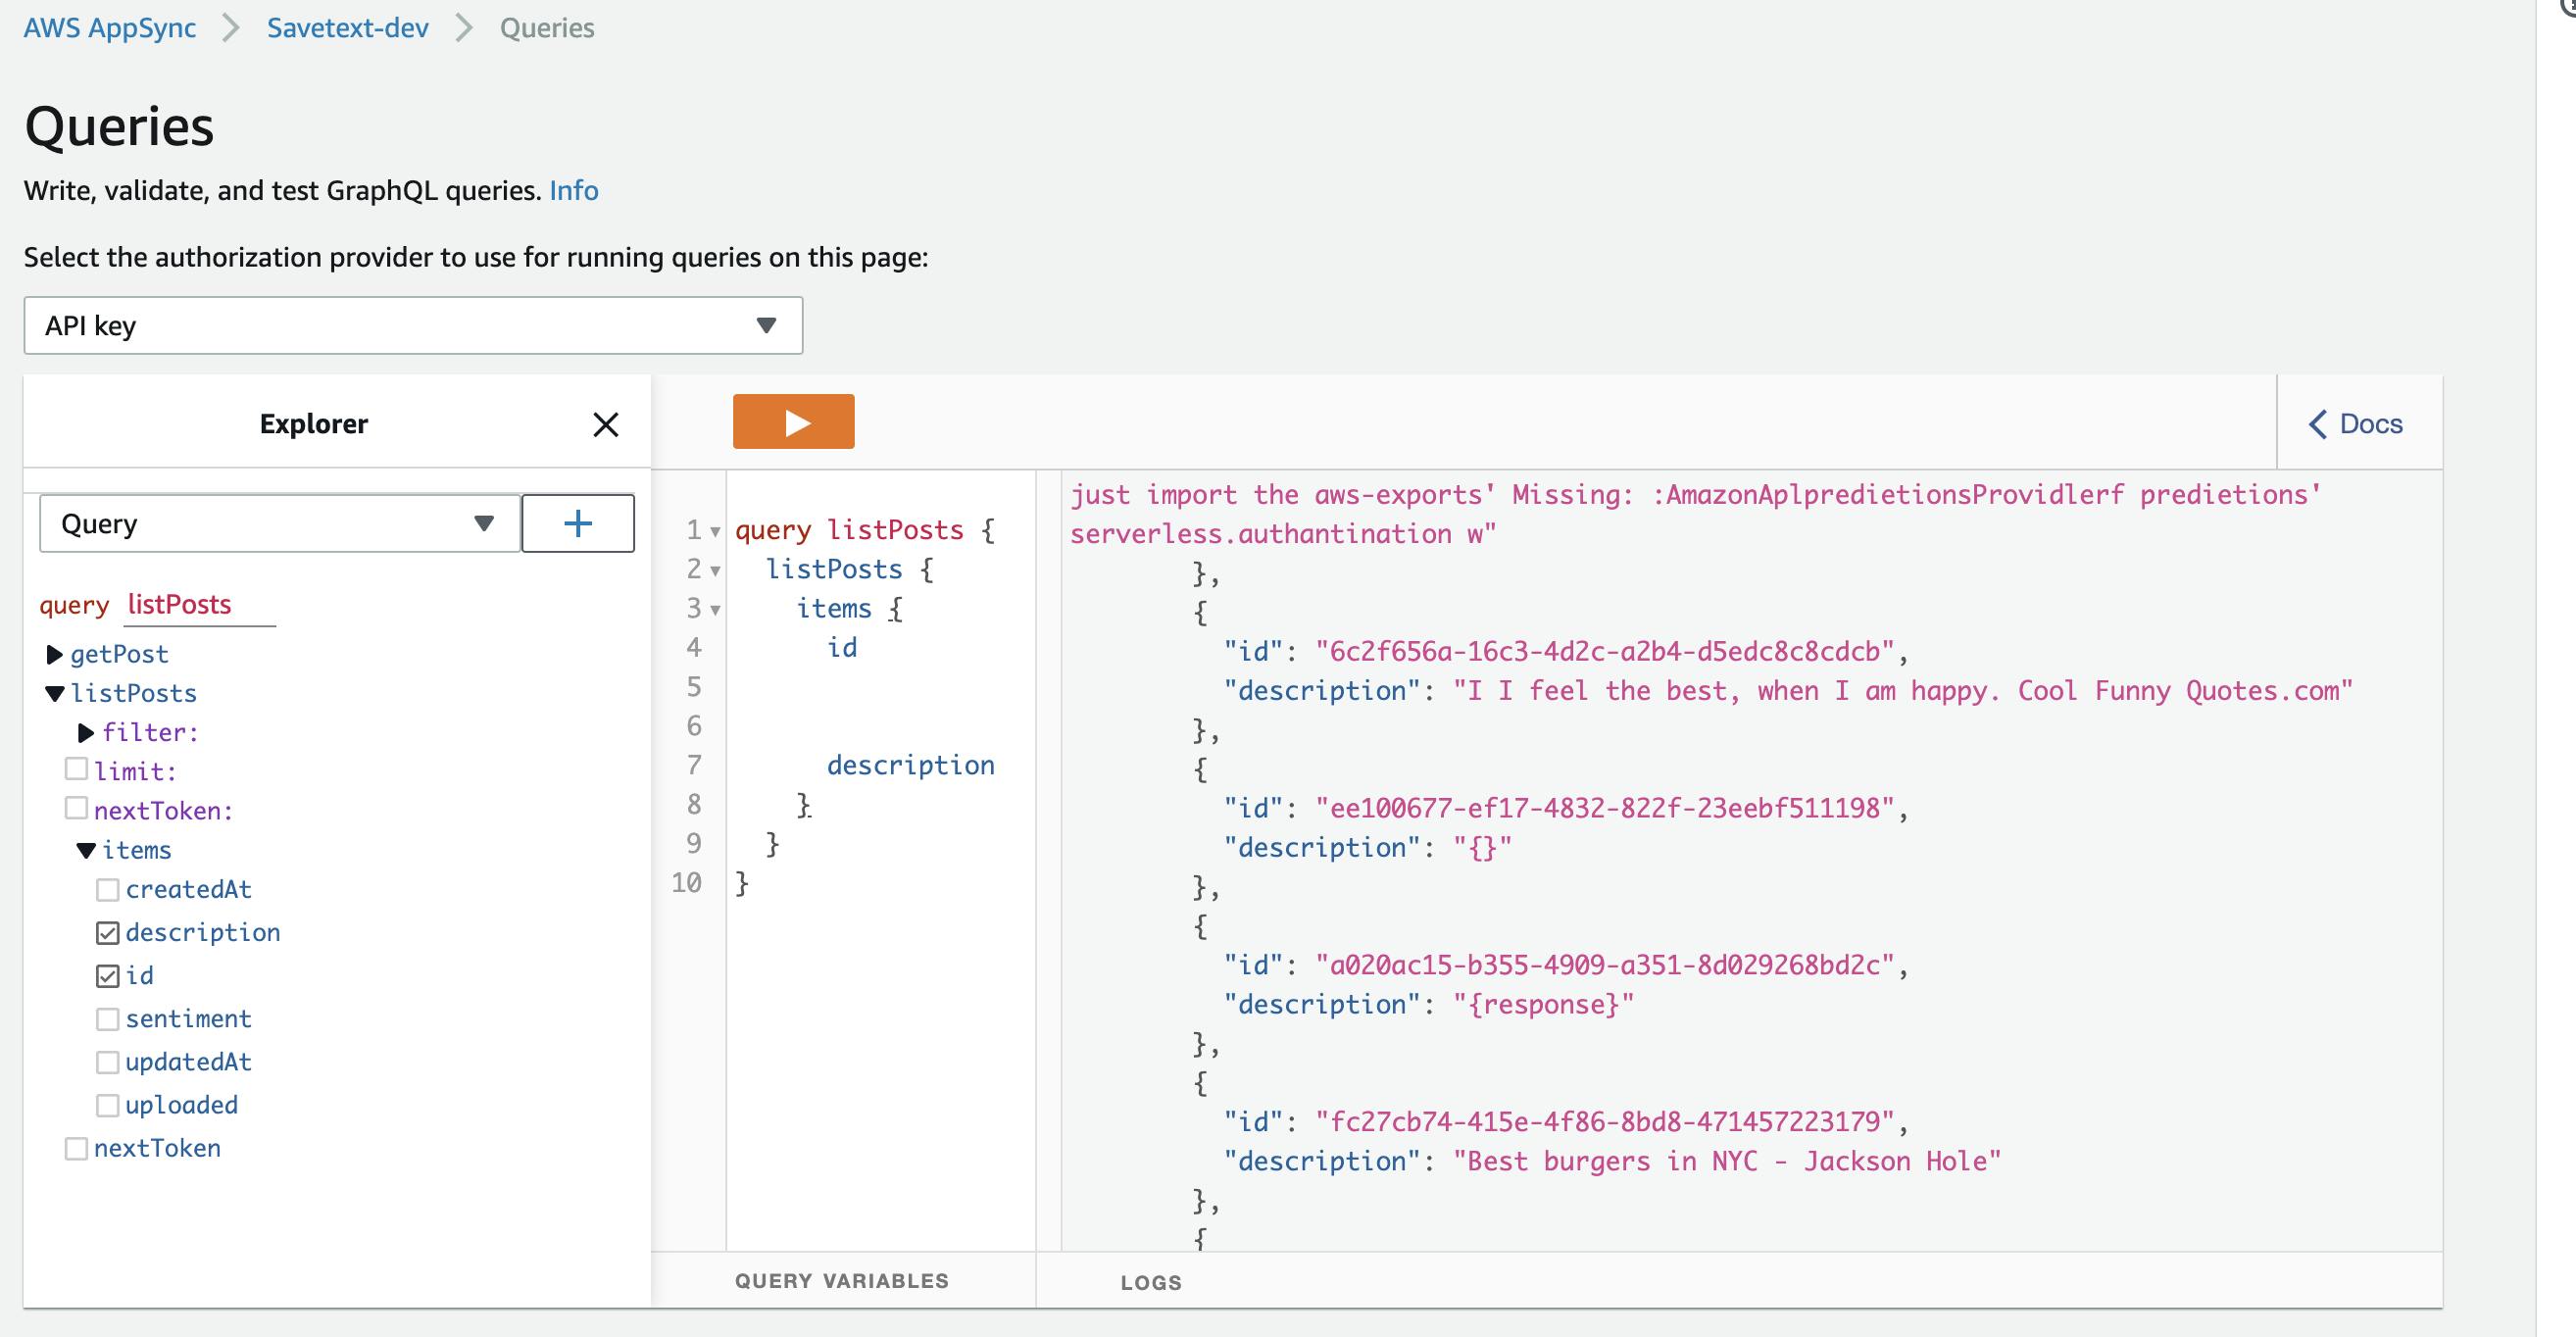
- Next let's query for the newly created post. PS as you can see here i have already some data saved inside the GraphQL but you can see that
Best burgers in NYC - Jackson Holewas saved
Configuring our React app. Now that our API is ready and working, we can start to work on our CRUD capabilities. I will be going through how to do a create and read function.
First, if you havent done it in part 1, we will configure the React application to be aware of our Amplify project. To do so, in
index.js, add the following code
import Amplify from 'aws-amplify'
import config from './aws-exports'
Amplify.configure(config)
- We will first create a
Post.jsfile in which we input the below
import React from 'react'
import { css } from '@emotion/css'
import { Link } from 'react-router-dom';
import Table from 'react-bootstrap/Table'
import './App.css';
import 'bootstrap/dist/css/bootstrap.min.css';
import "datatables.net-dt/js/dataTables.dataTables"
import "datatables.net-dt/css/jquery.dataTables.min.css"
import Badge from 'react-bootstrap/Badge'


export default function Posts({

  posts = []

}) {
  console.log(posts)

  return (

    <>

    <table id="example" class="table table-hover table-bordered">
        <thead>
            <tr>
                <th>Text id</th>
                <th>Text</th>
                <th>Analysis</th>
            </tr>
        </thead>
        <tbody>
            {
                posts.map(post => (
                    <tr key ={post}>
                        <td>{post.id}</td>
                        <td>{post.description}</td>

                        <td>
                         <Badge>{post.sentiment}</Badge>
                        </td>
                    </tr>

                ))
            }
        </tbody>
    </table>

    </>
  )
}
- We are now going to interact with the GraphQL API from our ReactJS application. The main thing to take note of is this piece of code in the API call to fetch data. What this does is await the GraphQL query to execute and list all data in our schema
const postData = await API.graphql({ query: listPosts });
- We will now create a function in
App.jscalledfetchPostsas seen below which basically fetches the data and sets the data in our variablesetPostswhich we declared in our useState. useState is a hook which is utilized to maintain local states in function components.
  // function to get all post data
  async function fetchPosts() {
    try {
      const postData = await API.graphql({ query: listPosts });
      let postsArray = postData.data.listPosts.items;
      setPosts(postsArray);
    } catch (err) {
      console.log({ err })
    }
  }
We will now render the returned data in a data table. Before this, we first need to do add the below libraries ``` npm install --save datatables.net-dt npm install bootstrap --save npm install jquery --save
Next, let us adjust our
Post.jsto add in our data table. The final result of the`Post.jsshould look like this
import React from 'react'
import { css } from '@emotion/css'
import { Link } from 'react-router-dom';
import Table from 'react-bootstrap/Table'
import './App.css';
import 'bootstrap/dist/css/bootstrap.min.css';
import "datatables.net-dt/js/dataTables.dataTables"
import "datatables.net-dt/css/jquery.dataTables.min.css"
import Badge from 'react-bootstrap/Badge'


export default function Posts({

  posts = []

}) {
  console.log(posts)

  return (

    <>

    <table id="example" class="table table-hover table-bordered">
        <thead>
            <tr>
                <th>Text id</th>
                <th>Text</th>
                <th>Analysis</th>
            </tr>
        </thead>
        <tbody>
            {
                posts.map(post => (
                    <tr key ={post}>
                        <td>{post.id}</td>
                        <td>{post.description}</td>

                        <td>
                            {(() => {
                                switch (post.sentiment) {
                                case "POSITIVE":   return (
                                    <Badge variant="primary">{post.sentiment}</Badge>
                                );
                                case "NEGATIVE":   return (
                                    <Badge variant="danger">{post.sentiment}</Badge>
                                );
                                default:      return (
                                    <Badge variant="secondary">{post.sentiment}</Badge>
                                );
                                }
                            })()}

                        </td>
                    </tr>

                ))
            }
        </tbody>
    </table>

    </>
  )
}
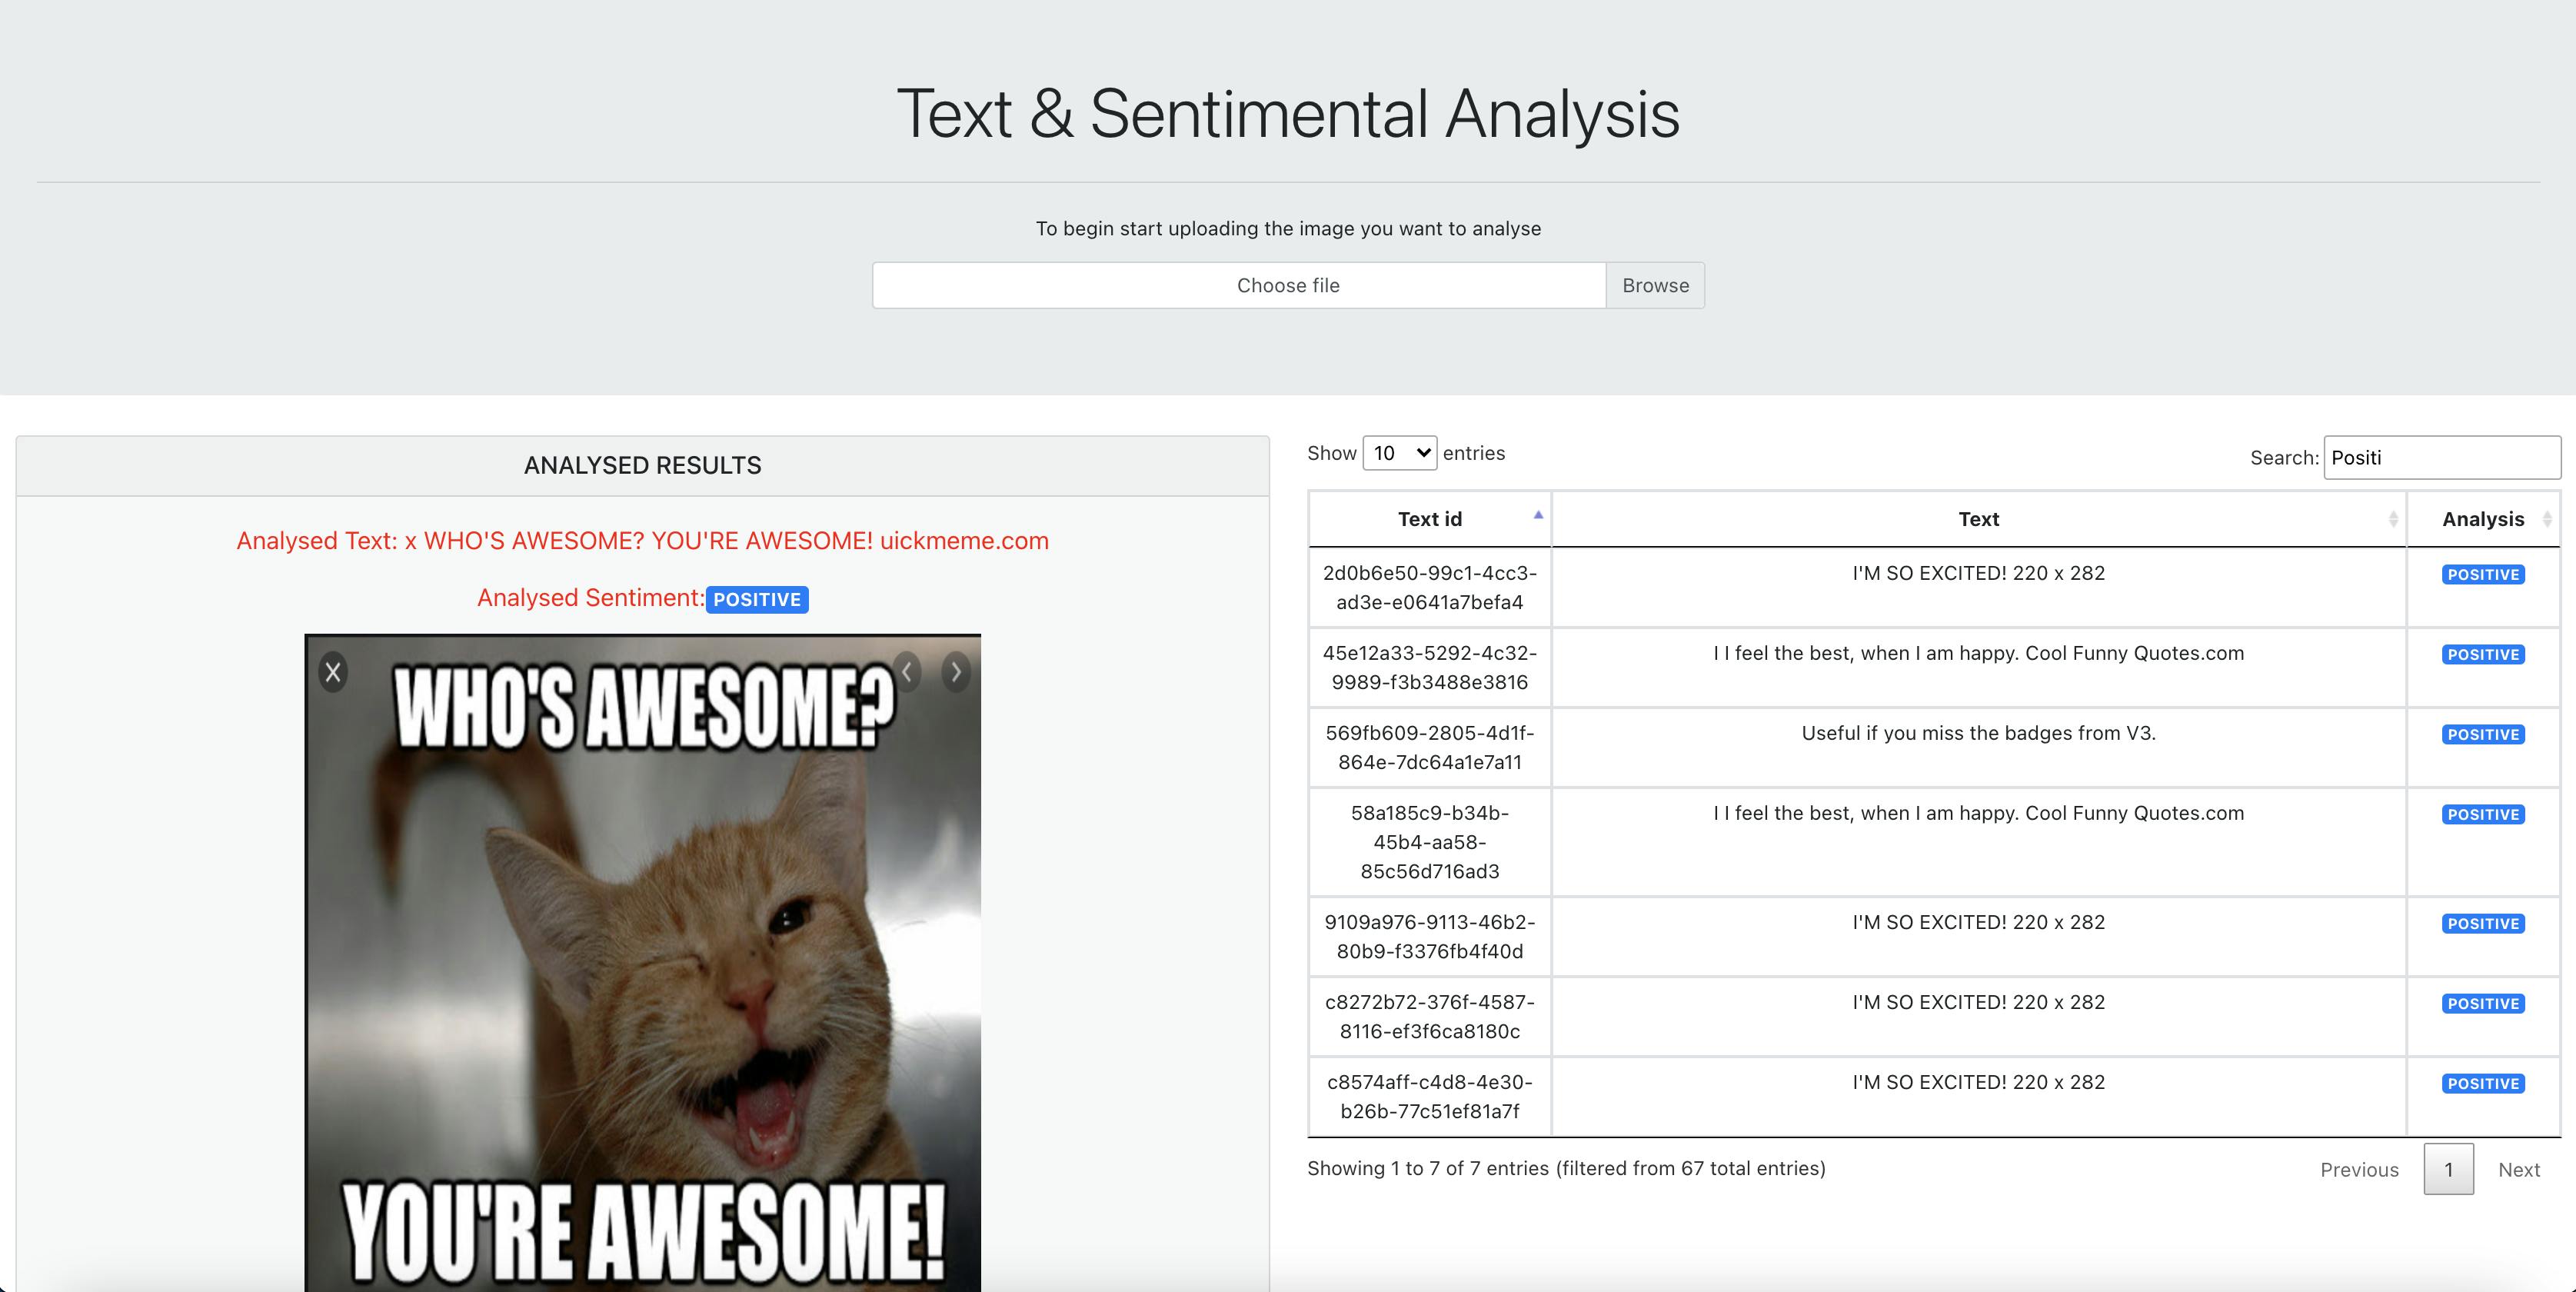
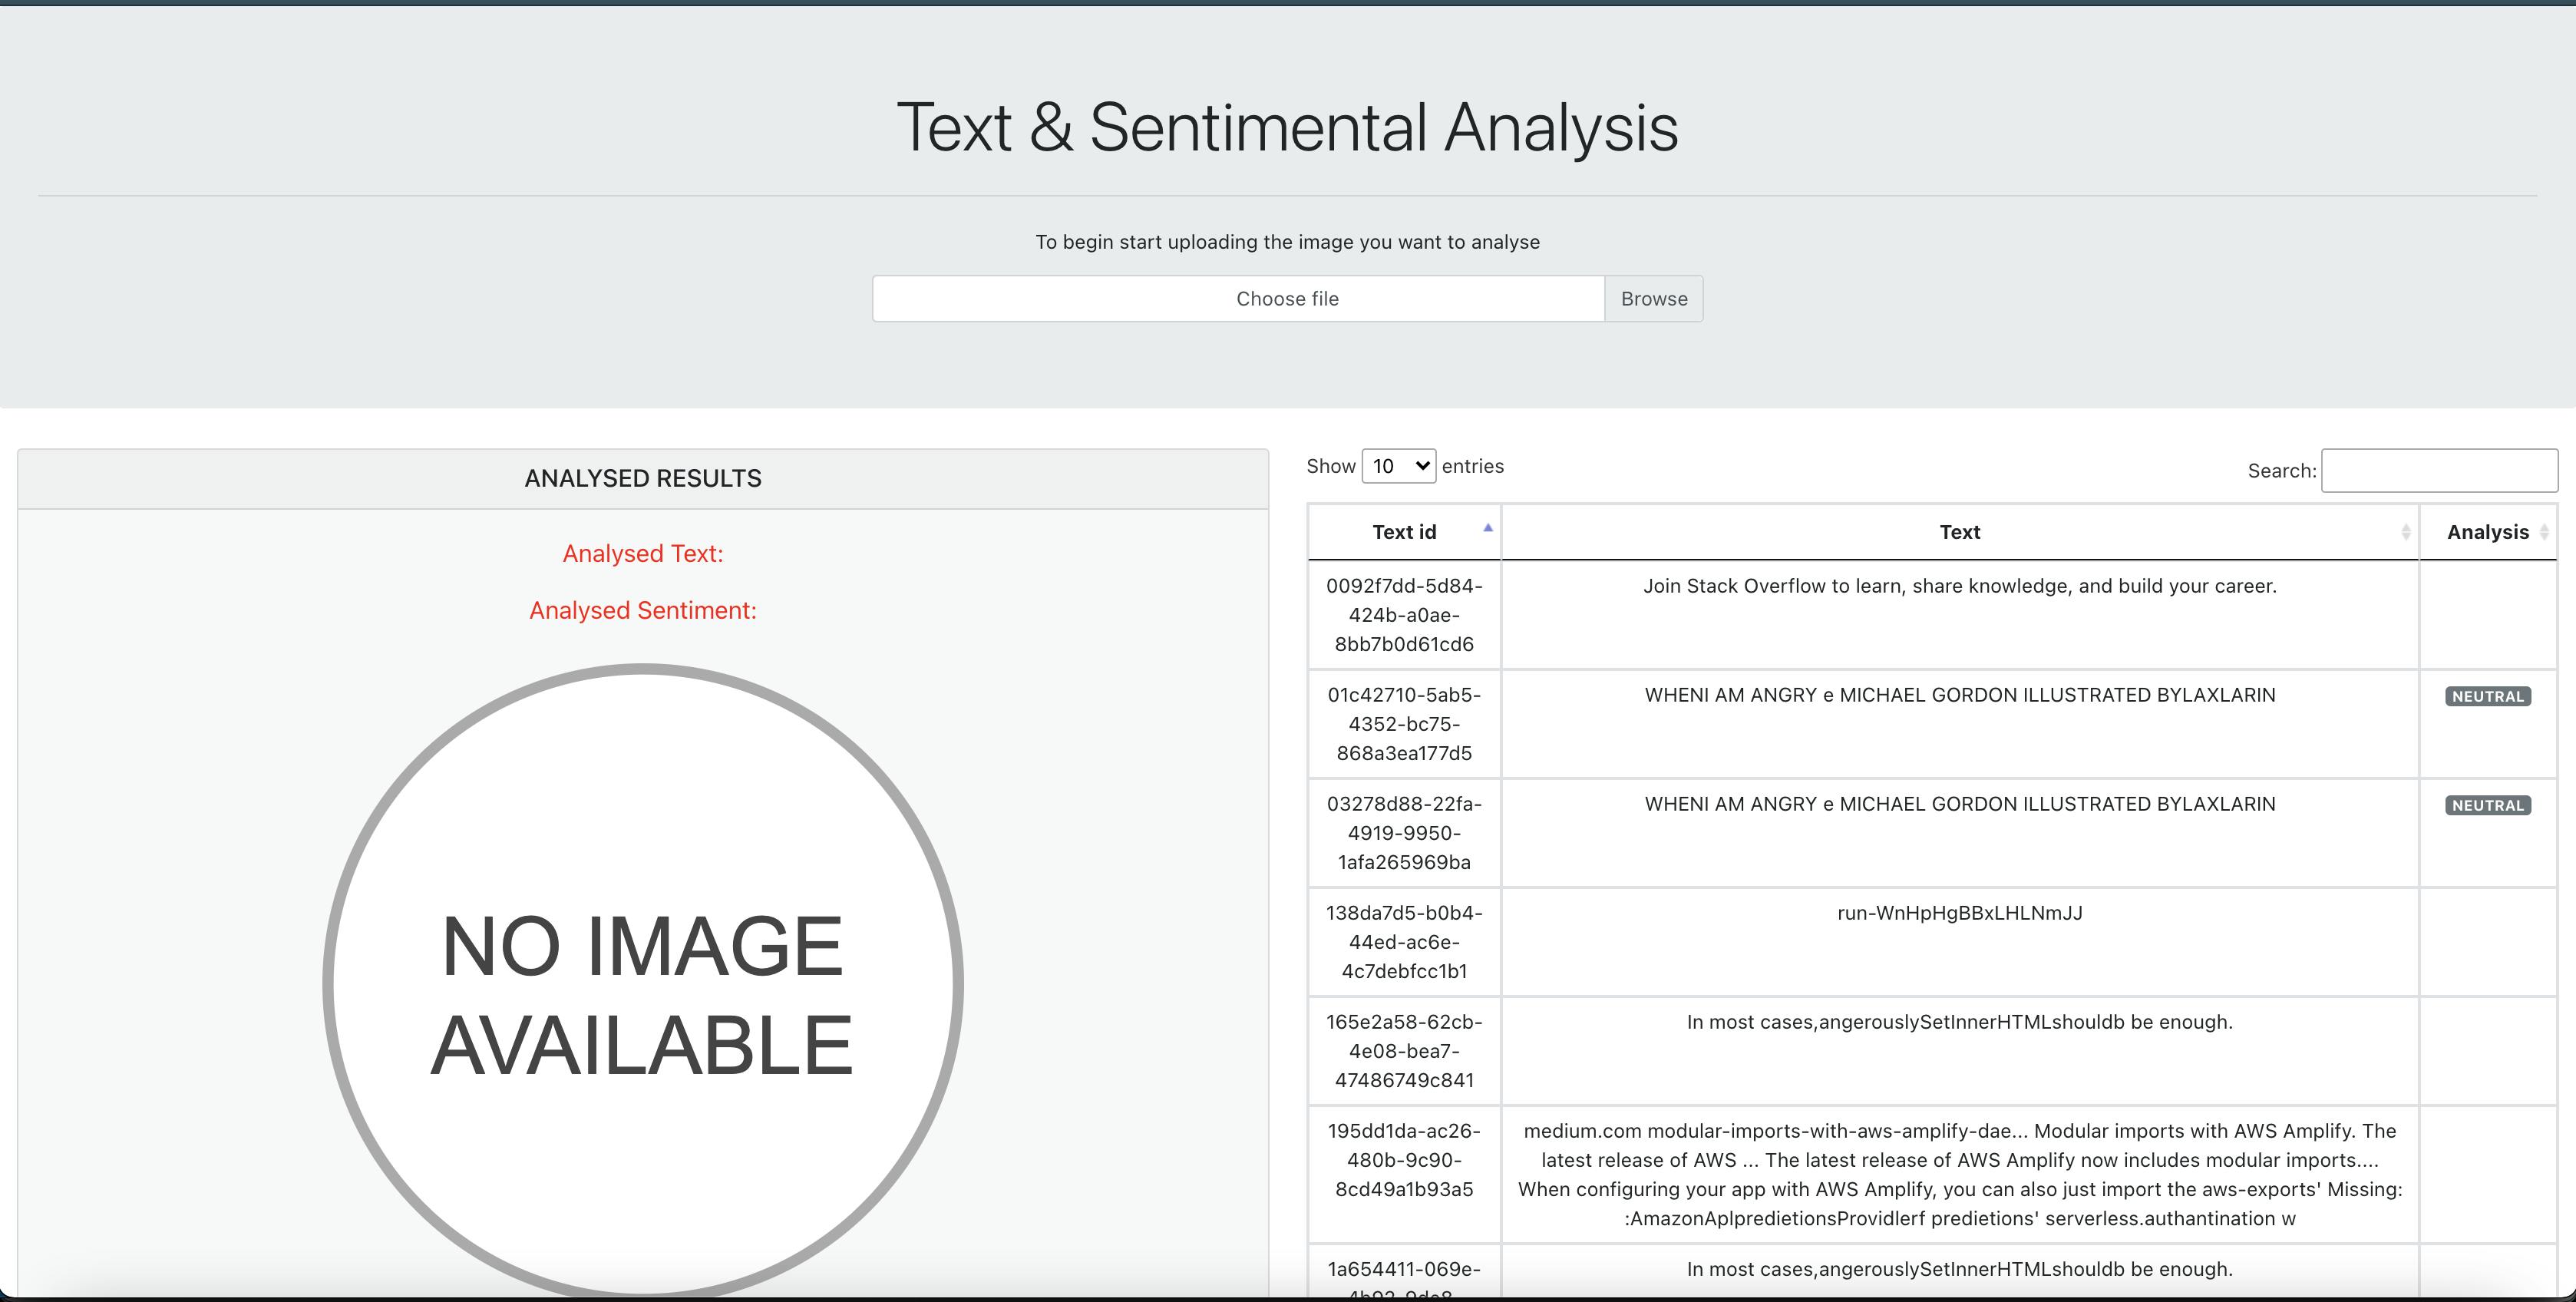
- Example of items fetched from our GraphQL
Example of items that have a positive sentimental analysis
Example of items that have a negative sentimental analysis

- We will also create a function called
savePostinApp.jscalled as seen below which saves our analysed text data and sentiment analysis output. The main thing to take note of is this piece of code in the API call which basically does the API call that saves the data.
const newTodo = await API.graphql({ query: mutations.createPost, variables: {input: postDeatils}});
- Our
savePostfunction is as seen below and we are saving both the extracted text result as well as the sentimental analysis generated.
  // function to save the post data
  async function savePost(result){
    const description = result[0].description
    const sentiment = result[0].analysis
    console.log(description)
    console.log(sentiment)
    try{
      const postDeatils = {
        description: description,
        sentiment: sentiment
      };
      const newTodo = await API.graphql({ query: mutations.createPost, variables: {input: postDeatils}});

    }catch(err){
      console.log({err})
    }
  }
- We are almost there. The last thing is to create an S3 bucket resource by doing a
amplify add storage
adrianlee@ladrian-a02 my-app % >**amplify add storage**
? Please select from one of the below mentioned services: **Content**
? Please provide a friendly name for your resource that will be used to label this category in the project: **<resource_name>**
? Please provide bucket name: **<unique_bucket_name>**
? Who should have access: **Auth and guest users**
? What kind of access do you want for Authenticated users? c**reate, update, read, delete**
? What kind of access do you want for Guest users? **create, update, read, delete**
? Do you want to add a Lambda Trigger for your S3 Bucket? **N**
- Adding our code to our application
const [images, setImages] = useState([])
const image = await Storage.get(file.name)
setImages(image)
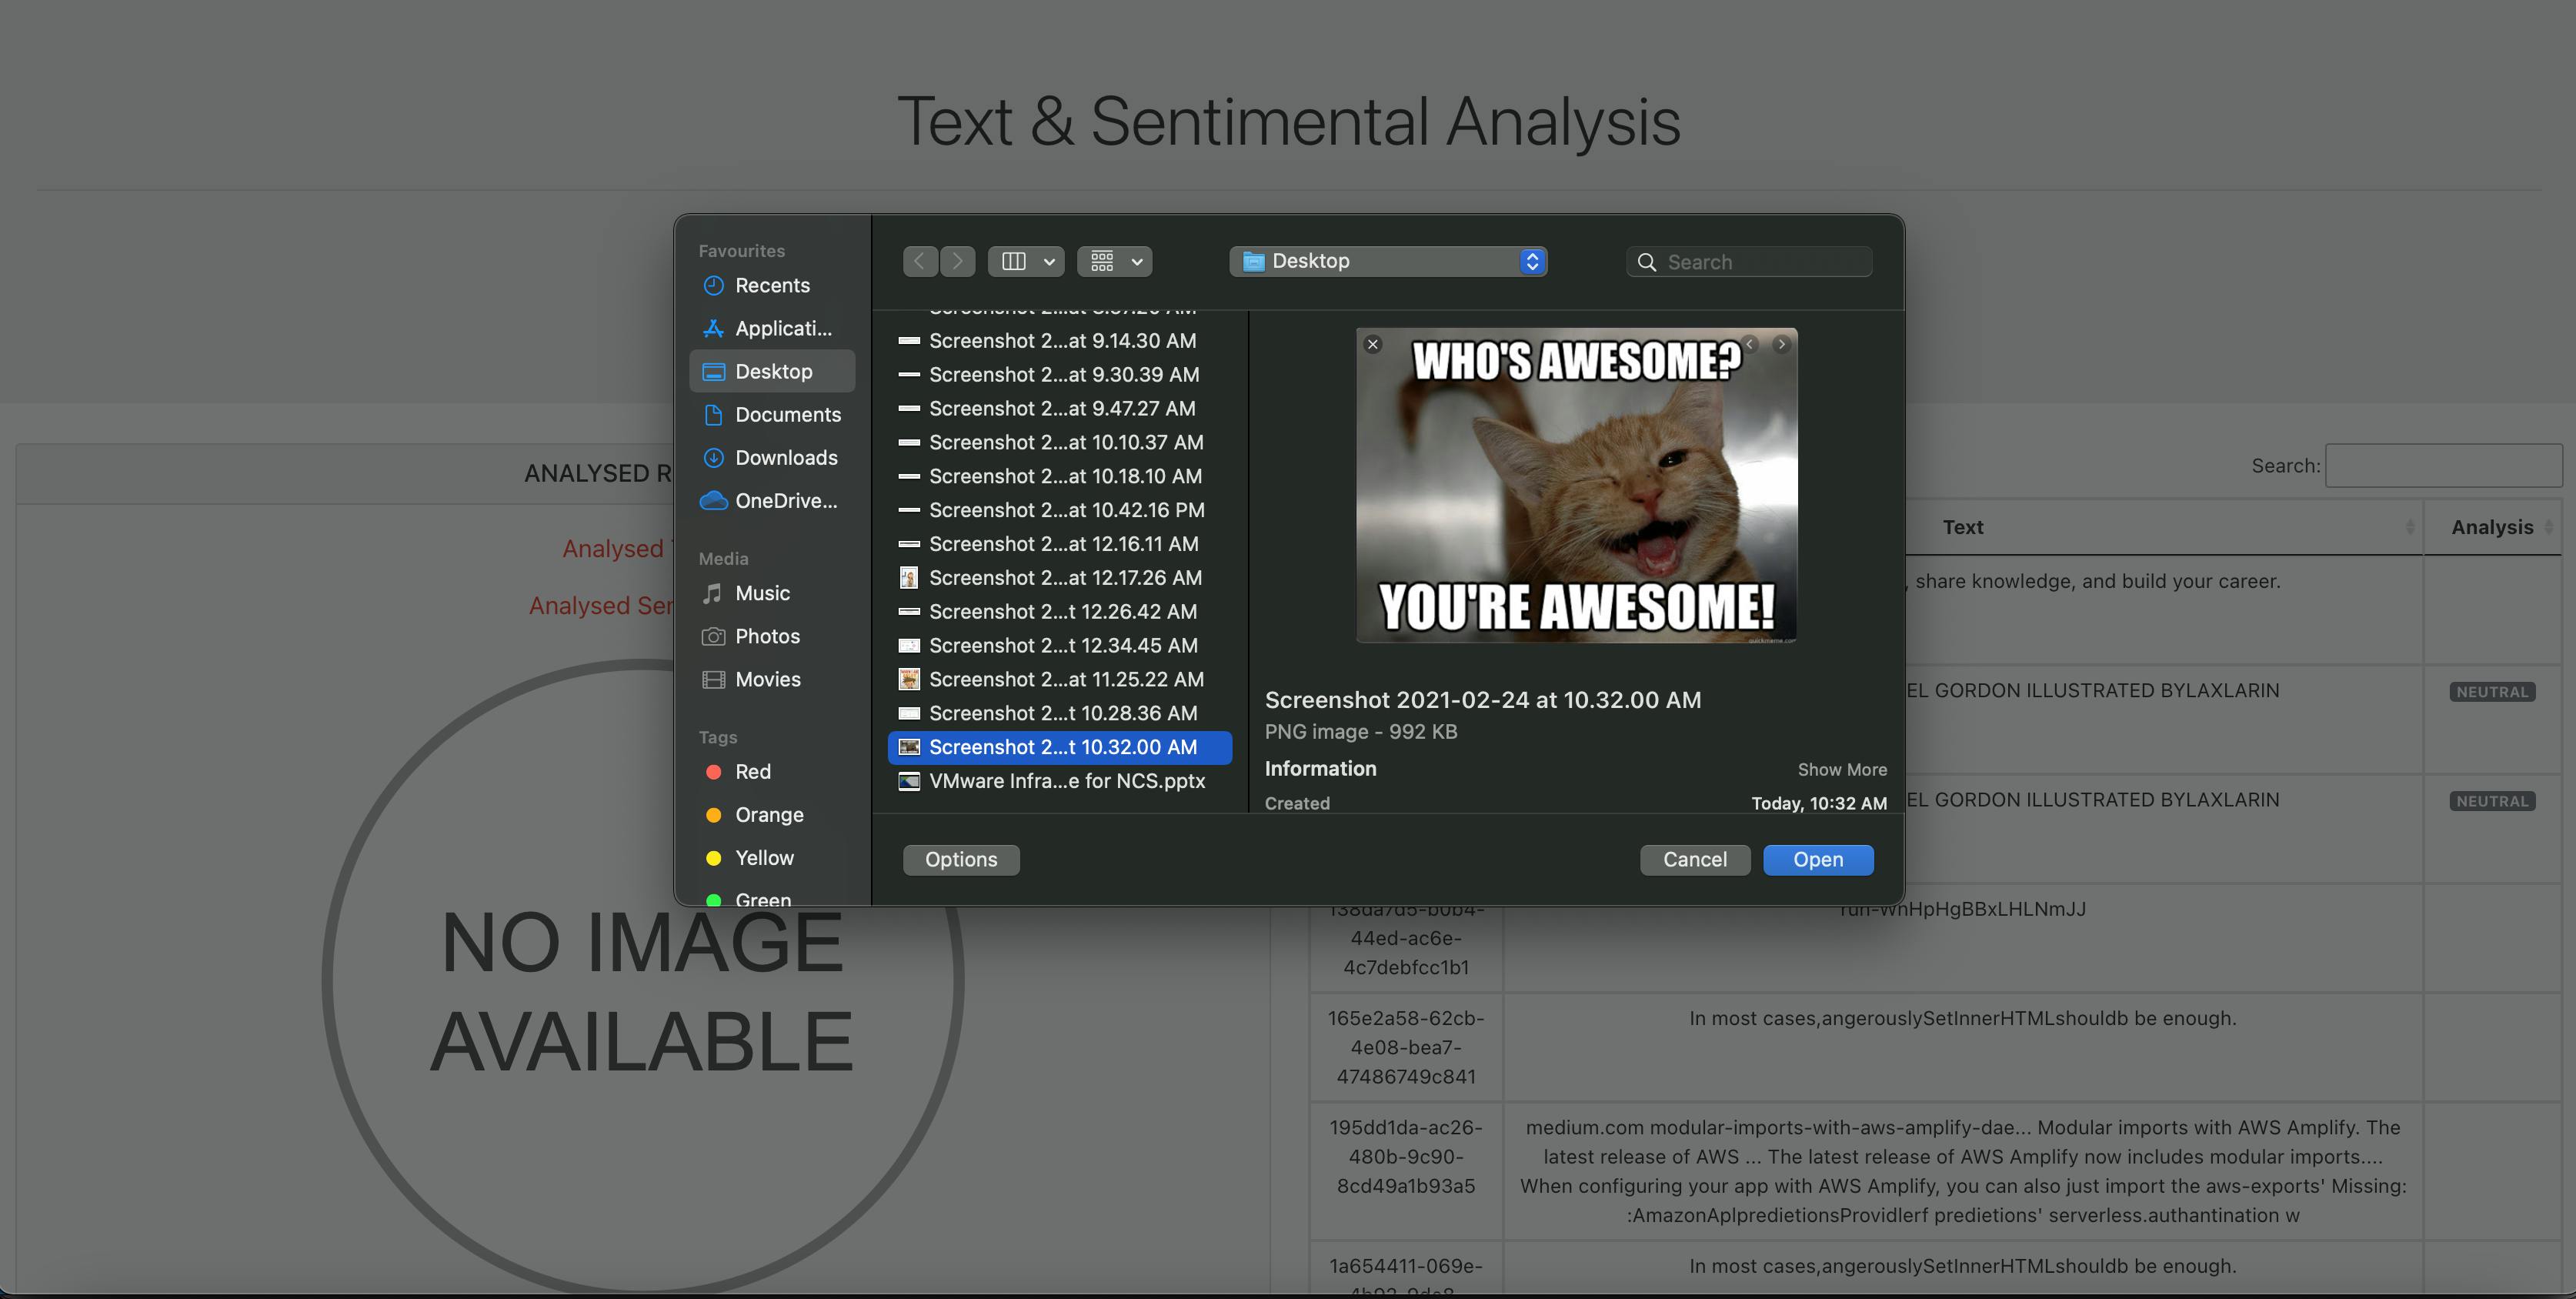
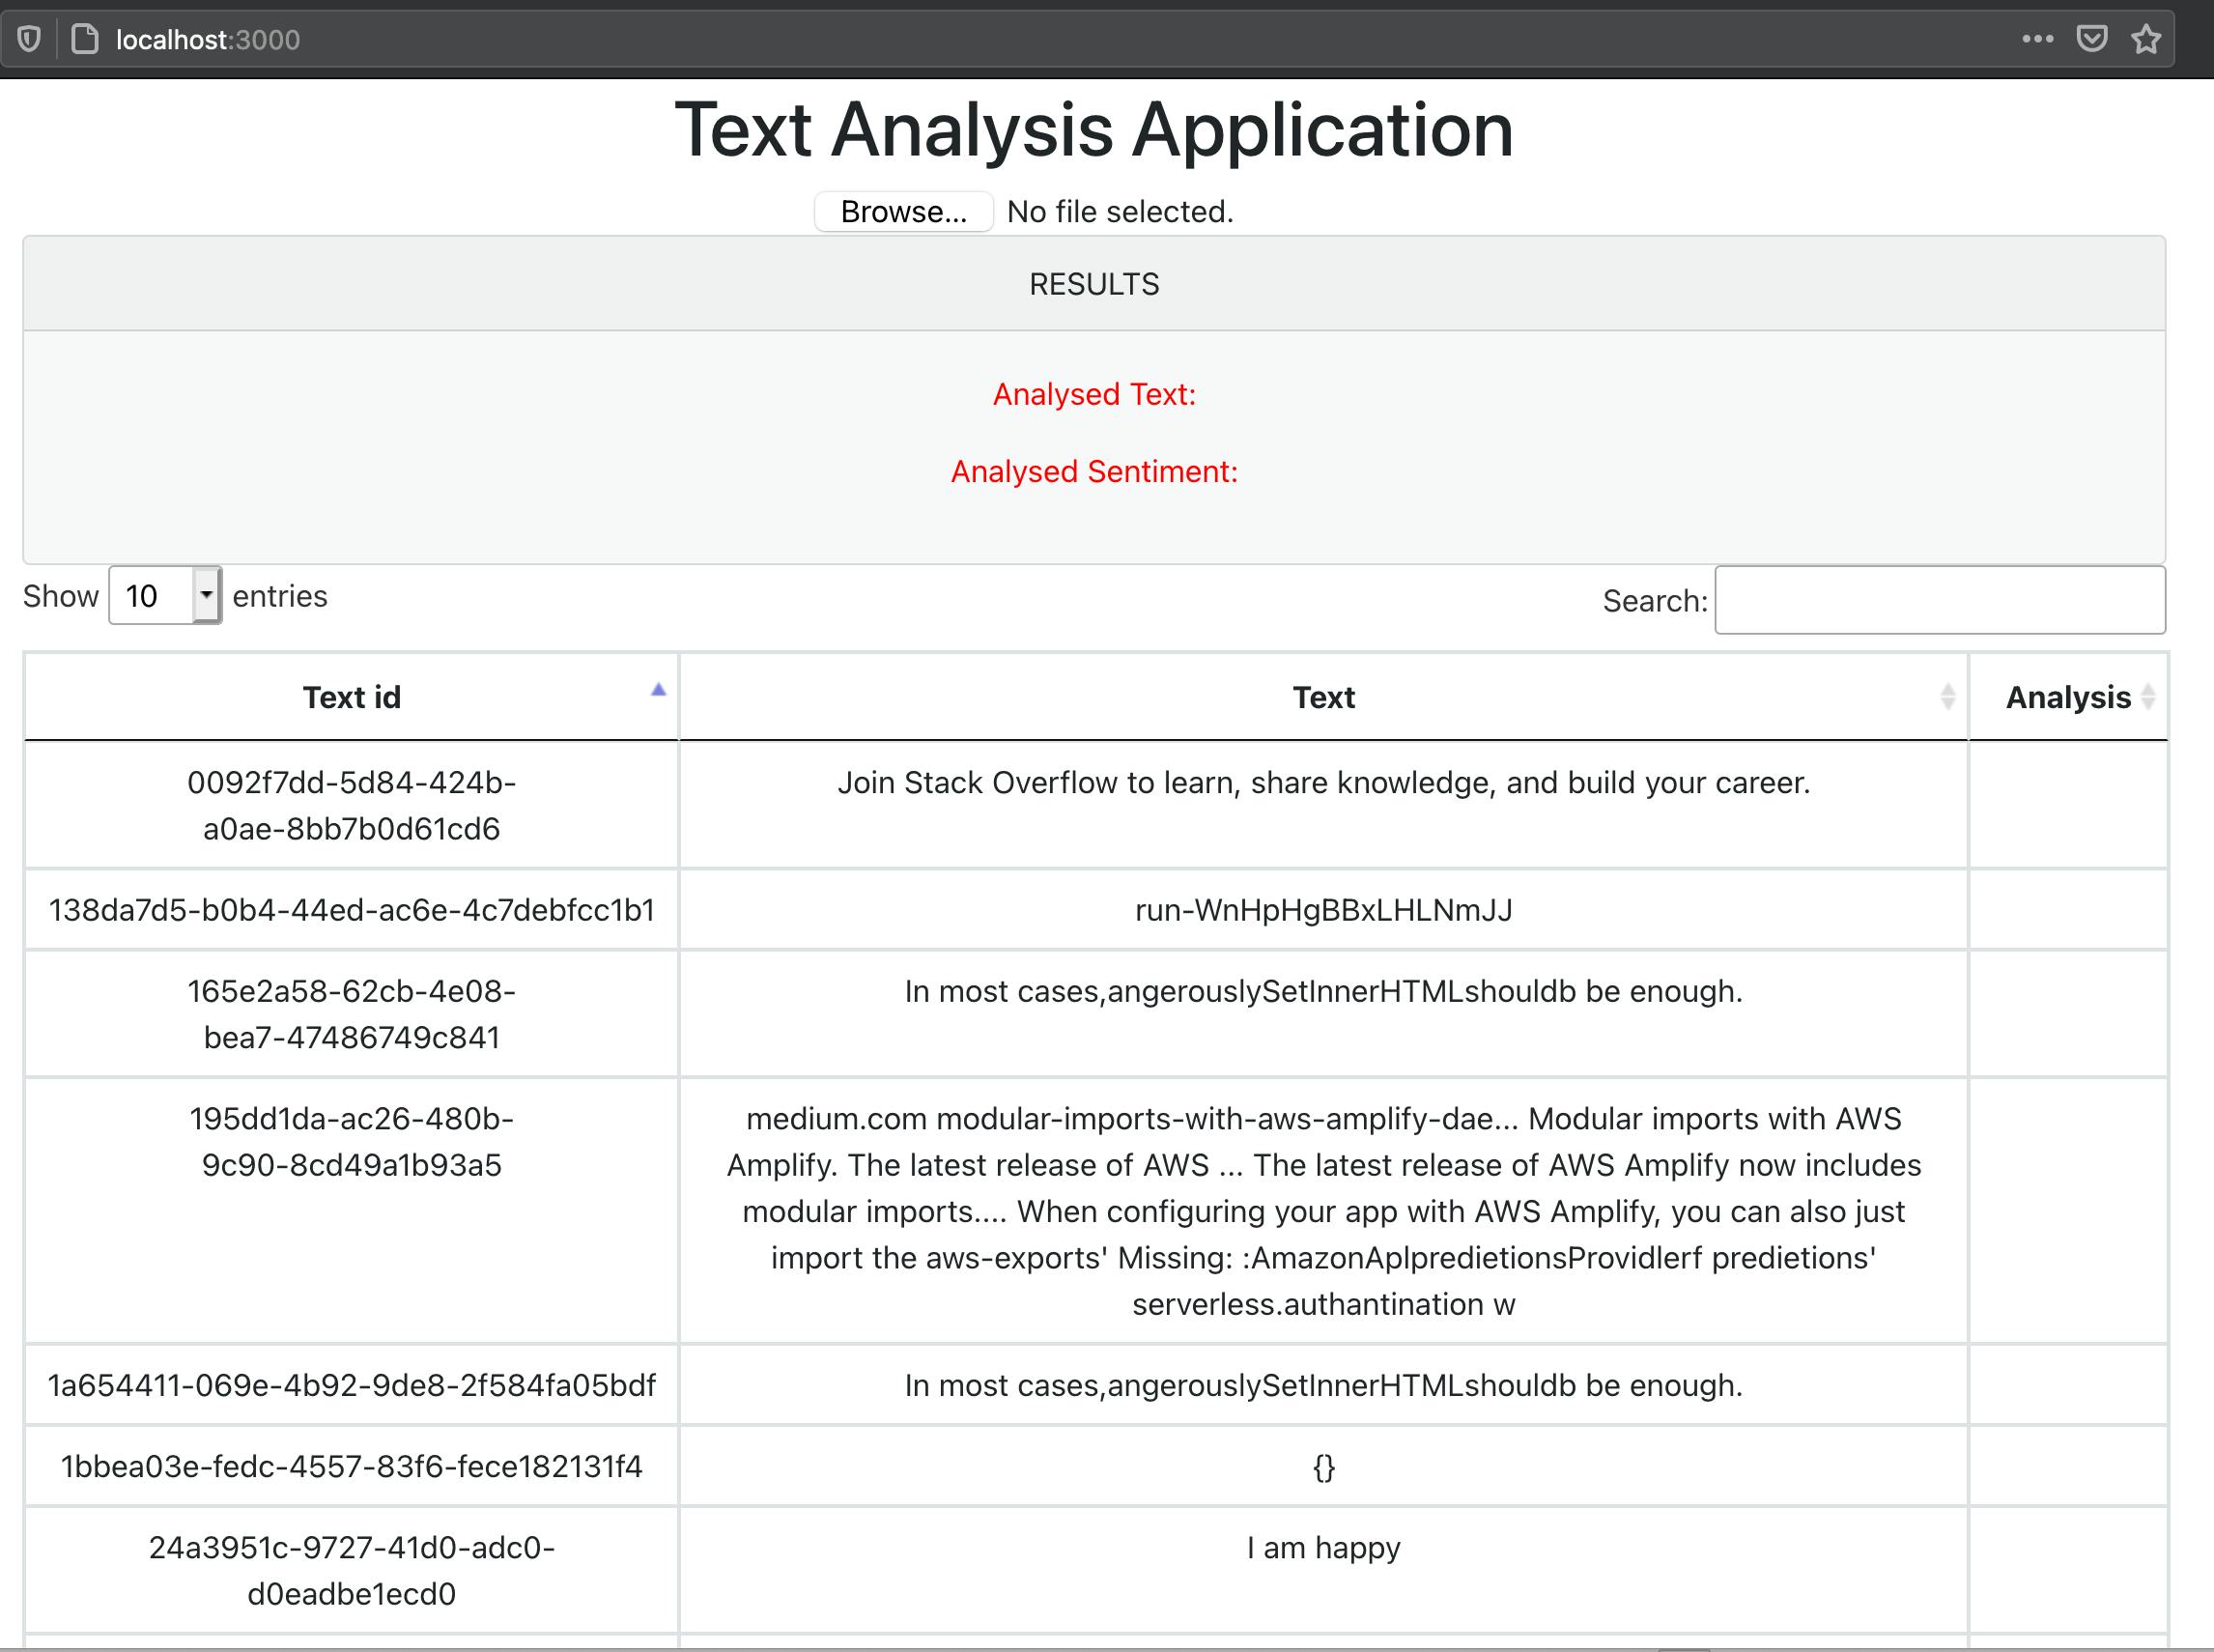
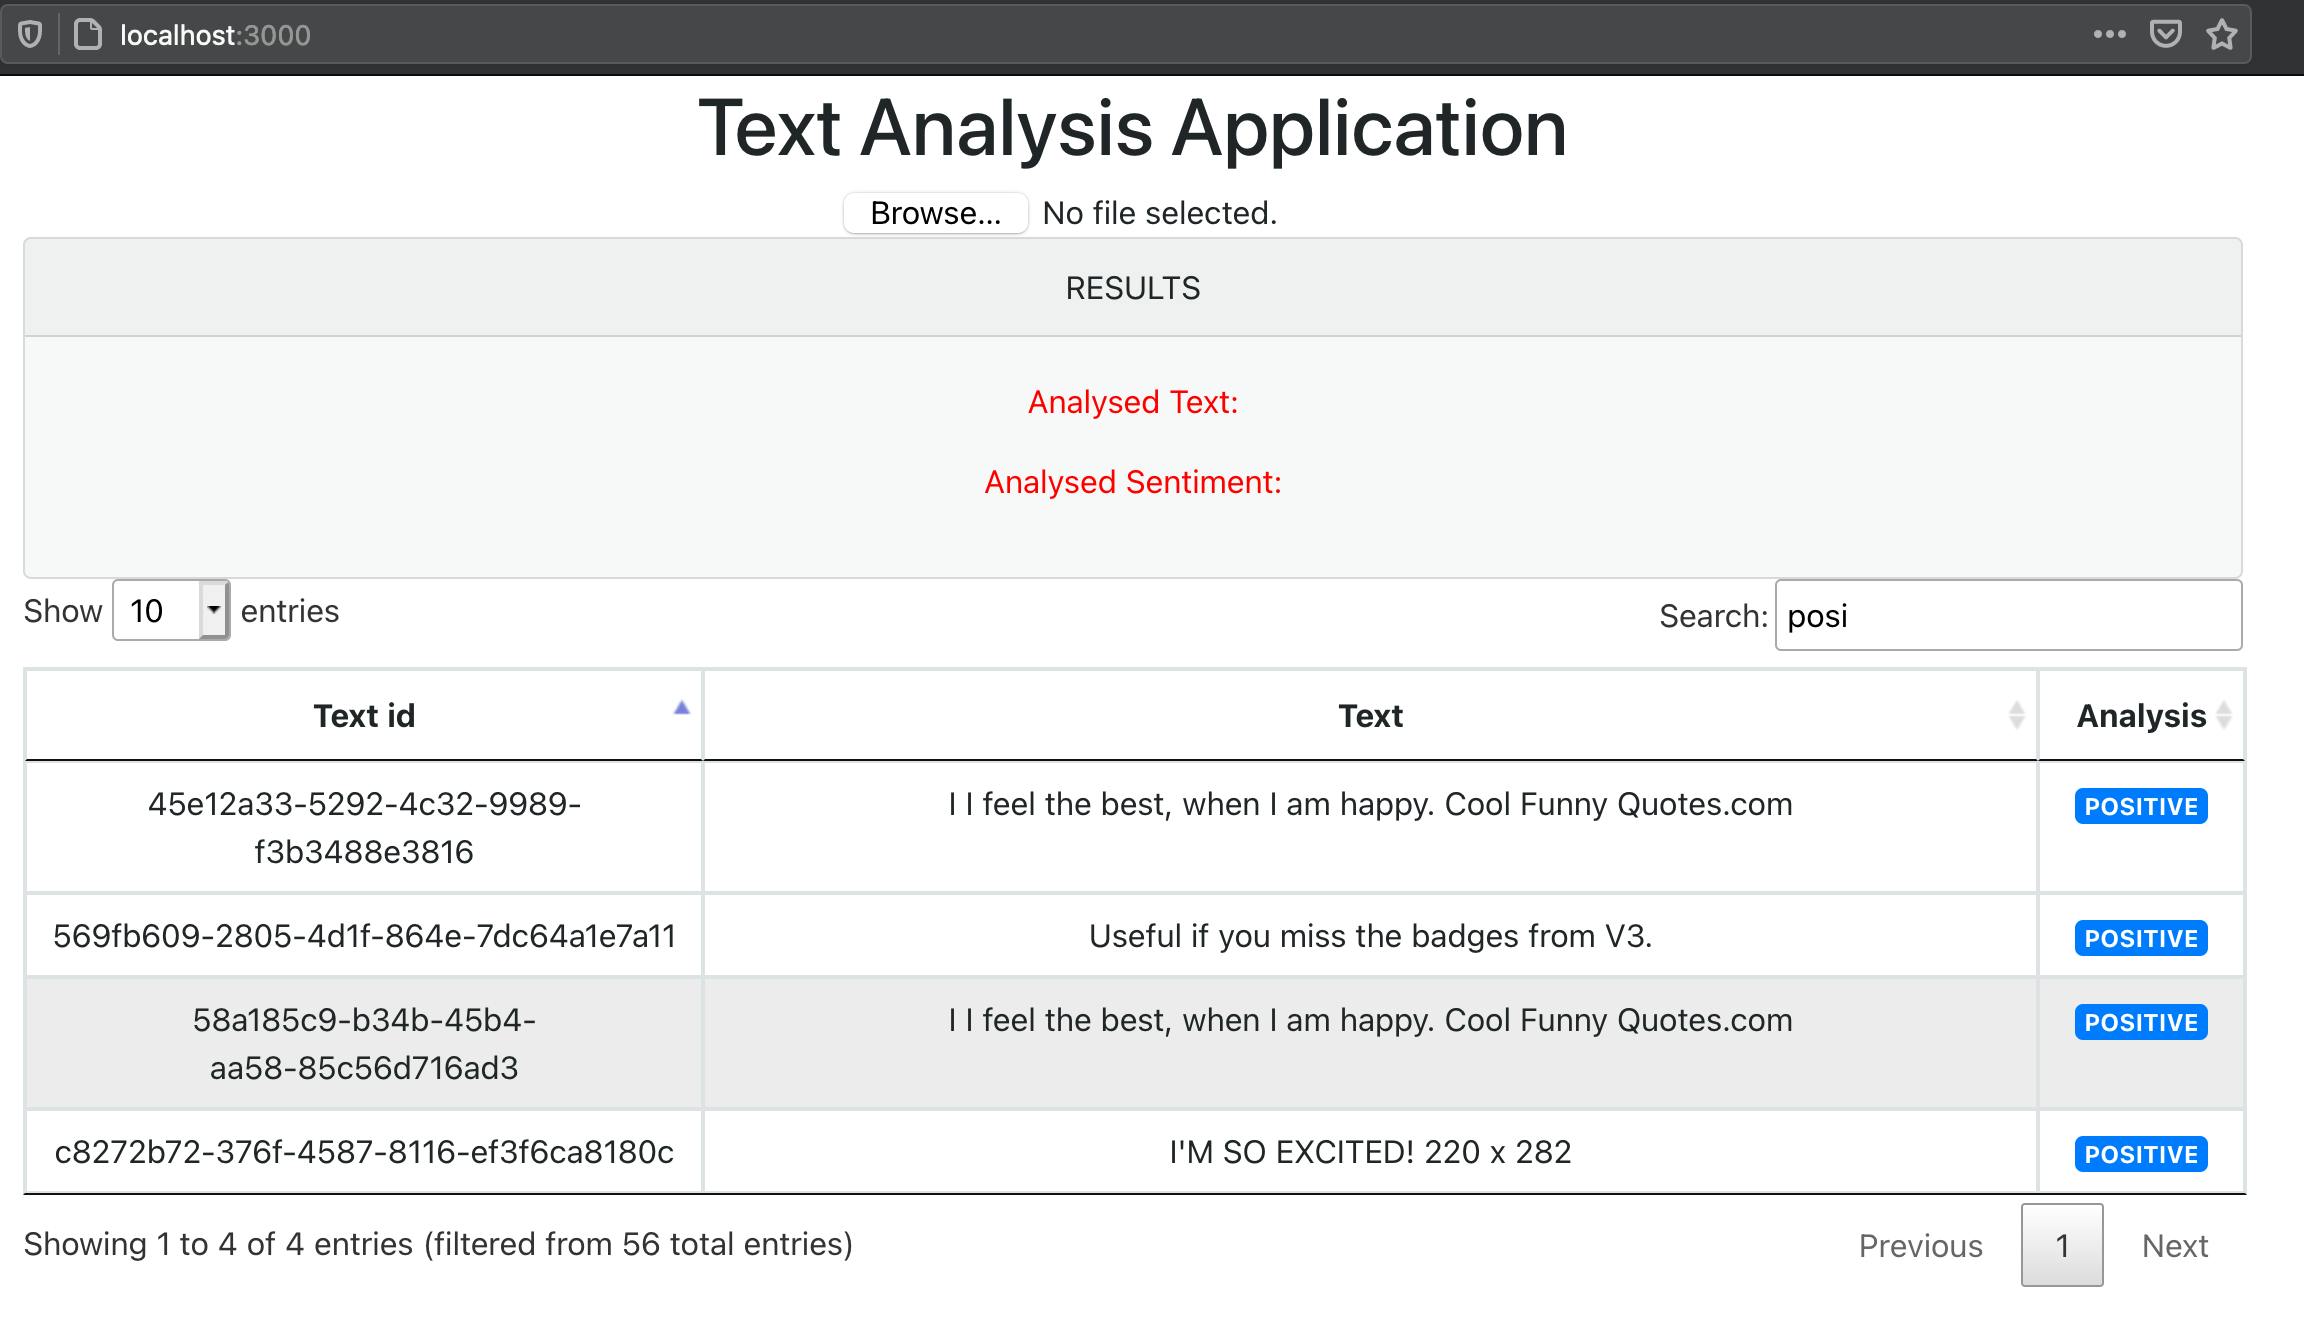
Now applying our CSS and styling, this is our final product
Uploading our image and running our Analysis and Interpretation. Alongside we have done our tagging of the image and saved the data. Stay tuned for the last part for deploying our application